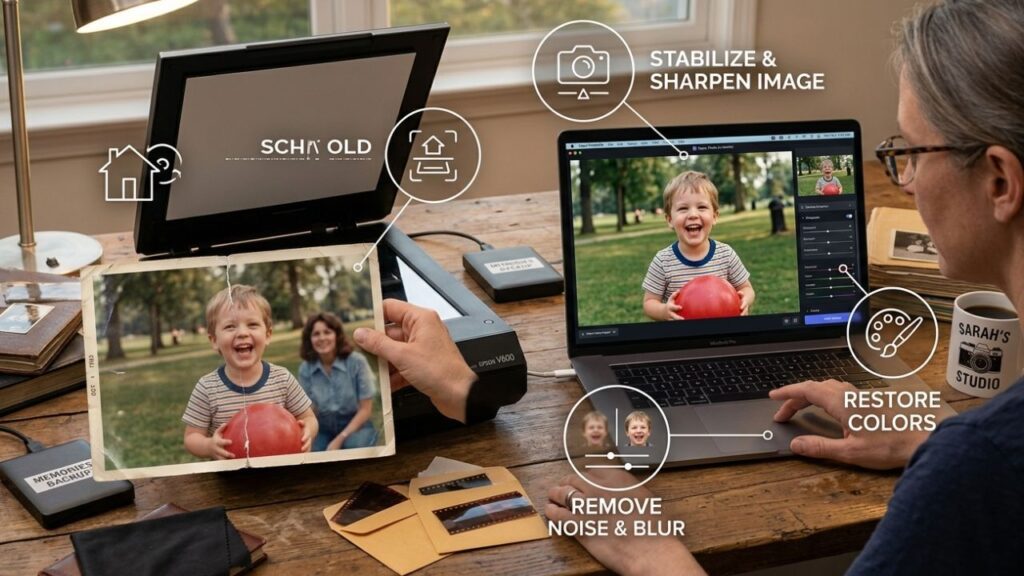
Resurrecting the Past: How to Fix Shaky, Blurry Childhood Photos from 2000s Digicams
Remember those early 2000s digital cameras? They were chunky, took a few seconds to power on, and had tiny screens. We thought the 3-megapixel resolution was amazing. Today, many of the photos from that era are stored on old hard drives or CDs, holding precious memories. The problem is, many of them are blurry, shaky, or just a little soft.
Before image stabilization became standard, a slight hand movement was all it took to ruin a shot. Thankfully, you no longer have to squint to see the faces in your favorite family photos. Modern technology makes it possible to fix these imperfect images, bringing clarity and life back to your most cherished moments. This guide will walk you through the process, step by step.
How to Fix Your Old Photos: A Step-by-Step Guide
Restoring old digital photos is much easier than you might think. You don’t need complicated software or professional editing skills. Follow these simple steps to bring your memories back into focus.
Step 1: Gather and Organize Your Digital Files
First, you need to locate your old pictures. Think back to where you might have stored them. Check old computers, external hard drives, forgotten USB sticks, and even CDs or DVDs labeled “Family Vacation 2004.” Early memory cards like SD, CompactFlash, or Memory Stick might also be hiding in a drawer.
Once you find them, create a dedicated folder on your main computer. Name it something clear, like “Old Photos to Fix.” Copy all the images into this folder. It’s critical to work with copies, so you always have the originals as a backup. This prevents any accidental changes to the source files. Organizing everything in one place makes the entire process smoother.
Step 2: Select an AI-Powered Restoration Tool
In the past, fixing a blurry photo required expensive software and a lot of technical skill. Today, artificial intelligence does the heavy lifting for you. AI-powered tools are designed to analyze and correct photos automatically. They can identify the cause of the blur, whether it’s from camera shake or a missed focus, and intelligently sharpen the image.
For general motion or focus issues, a tool designed to Unblur Image is your best starting point. These platforms use algorithms trained on millions of pictures to understand what a sharp photo should look like. They rebuild soft edges and recover details you thought were lost forever. If your photos also suffer from fading colors, scratches, or digital noise, you may need a more comprehensive solution for Old Photo Restoration. These specialized tools address multiple signs of aging at once, reviving color and repairing damage in addition to sharpening.
Step 3: Upload Your Blurry Photo
Once you’ve chosen a tool, the process is usually very straightforward. You’ll see a prominent “Upload” or “Get Started” button on the website. Click it and select a blurry photo from the folder you created in the first step. The tool will then upload the file to its server for analysis.
Behind the scenes, the AI gets to work. It scans the image pixel by pixel to detect inconsistencies that cause blurriness. It identifies soft edges, motion trails, and out-of-focus areas. Based on this analysis, it predicts what the sharp, clear version of the image should look like and begins reconstructing it. This entire process typically takes less than a minute.
Step 4: Compare the Before and After
After the processing is complete, the tool will show you a comparison. Most display the original and the enhanced photo side by side, often with a slider you can drag to see the changes. Take a moment to examine the result.
Look for key details, especially in faces, text, or textured backgrounds. You should see a significant improvement in clarity. Faces will be more defined, eyes will be sharper, and elements you couldn’t make out before should become visible. Some tools may offer additional controls to adjust the level of sharpening or noise reduction, but the automatic settings are often all you need.
Step 5: Download and Cherish Your New Photo
If you’re happy with the result, the final step is to download the restored image. Look for a “Download” button to save the high-resolution version to your computer. To keep things organized, save it in a new subfolder, perhaps named “Restored Photos.”
It’s a good practice to rename the new file. For example, if the original was `IMG_0123.jpg`, you could name the fixed version `IMG_0123_restored.jpg`. This ensures you don’t overwrite your original file and makes it easy to find the improved versions later. Now your restored photo is ready for sharing, printing, or just enjoying.
Tips for the Best Photo Restoration Results
Following the steps above will yield great results, but a few extra tips can take your photo restoration to the next level.
* Always Use the Highest Quality Original: The better the source file, the better the final result. If you have the same photo saved in multiple places, use the one with the largest file size and resolution.
* Fix One Major Issue at a Time: If a photo is both blurry and has poor color, let the AI tool handle it all at once. If you are doing manual edits, address color balance and exposure before you sharpen the image.
* Avoid Over-Sharpening: Too much sharpening can make a photo look unnatural and create weird halos around objects. A good restoration should look crisp, not artificial. Trust the AI’s default settings before pushing any sliders too far.
* Set Realistic Expectations: While AI is powerful, it can’t perform miracles. A photo that is a complete blur may only become slightly less blurry. However, most photos with common camera shake or focus issues can be improved dramatically.
* Check for Color Shifts: Sometimes, the sharpening process can slightly alter the color tones in an image. After enhancing, glance over the photo to make sure the colors still look natural and true to the memory.
Here is a quick reference for what to look for when you sharpen an image.
| Quality | Good Sharpening | Bad Sharpening (Over-sharpened) |
| Edges | Clean and defined | Harsh, with bright “halos” |
| Texture | Natural and detailed (e.g., fabric) | Gritty, grainy, and artificial |
| Faces | Clearer features, sharp eyes | Unnatural lines, waxy-looking skin |
| Overall Look | Crisp and in-focus | Brittle and electronically distorted |
Common Mistakes to Avoid
While the process is simple, a few common mistakes can lead to frustration. Here’s what to watch out for.
Forgetting to Back Up the Original
This is the most important rule. Always work on a copy of your photo. Never apply edits directly to your only original file. Storage is cheap, but memories are irreplaceable. Creating a backup takes seconds and can save you from accidentally ruining a cherished photo forever.
Using a Low-Resolution Thumbnail
Trying to restore a small image you saved from a text message or an old social media site won’t work well. These images have already been compressed and have lost a lot of data. The AI has less information to work with, leading to a pixelated or blocky result. Always try to find the original file from the camera.
Expecting Perfection from Every Photo
Some photos are too damaged or blurry to be fully recovered. If the subject was moving very fast or the camera was extremely out of focus, the AI may struggle to rebuild the details. The goal is improvement, not perfection. Celebrate the clarity you can bring back rather than focusing on any remaining imperfections.
Ignoring Other Photo Flaws
Blur is often the most obvious problem, but don’t forget to look for others. Many photos from the 2000s also have issues like red-eye from the flash, poor lighting, or faded colors. Modern restoration tools can often fix these issues at the same time they fix the blur, so be sure to check for all potential improvements.
Conclusion
Those blurry photos from your childhood aren’t lost causes. They are windows into the past, filled with stories and emotions. Thanks to incredible advances in technology, you no longer need to be a photo editing expert to restore them. By following a few simple steps, you can fix camera shake, correct focus, and bring your treasured memories back to life.
So go ahead, open up those old folders and find your favorite shots. A few clicks are all it takes to transform a blurry, forgotten picture into a clear and vibrant keepsake you can proudly share with family and friends for years to come.