How to Plan a Bathroom Renovation Timeline Without Blowouts
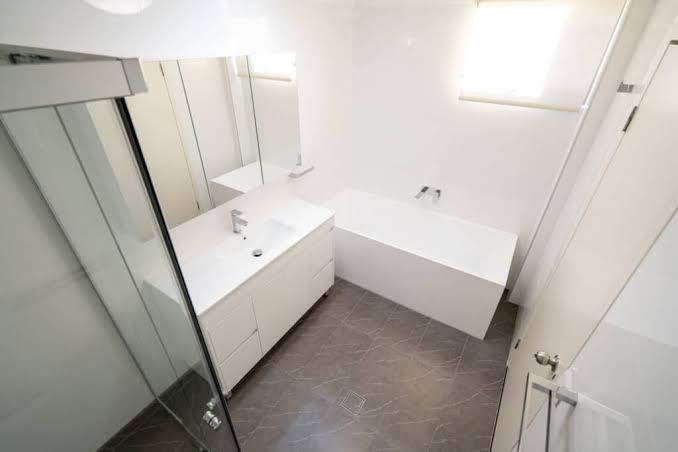
A bathroom renovation looks deceptively simple from the outside. It is a small room, a short list of fixtures, and a clear goal: make it nicer and more functional. In reality, bathrooms are one of the most sequencing-heavy spaces in a home. You have plumbing, electrical, waterproofing, tiling, cabinetry, ventilation, and detailed fit-off work that all depend on the previous step being done correctly.
A solid timeline is not just a calendar estimate. It is a way to reduce rework, avoid trades waiting on each other, and prevent last-minute substitutions when a key item is out of stock. If you understand what happens in each stage and where delays typically appear, you can plan the project with a lot more confidence.
In many homes, the biggest time savings come from agreeing on scope early, because changing the layout or finishes midstream often forces multiple steps to be redone. That’s why the early planning phase for bathroom renovations Melbourne style projects often focuses on clarifying inclusions and sequencing before any demolition begins.
Start with a timeline that matches the scope
A cosmetic refresh (new vanity, repaint, minor fixture swaps) can move quickly, especially if waterproofing and tiling are untouched. A full renovation is different. Once you change waterproofing, relocate plumbing, or re-tile, the job becomes a chain of dependent tasks.
When you sketch the timeline, separate it into two layers:
- Decision timeline: when selections must be final (tiles, vanity size, tapware finish, shower screen type).
- Build timeline: when trades occur on site (demo, rough-in, waterproofing, tiling, fit-off).
Most blowouts happen when the decision timeline lags behind the build timeline.
Pre-construction: design, selections, and ordering
This stage is where you can “buy back” weeks later. You want the layout locked, the key measurements confirmed, and product lead times checked.
Common tasks here include:
- Finalizing the bathroom layout and fixture locations
- Confirming plumbing and electrical requirements
- Selecting tiles, vanity, tapware, toilet, shower, and accessories
- Ordering items with longer lead times (vanities and custom shower screens are typical)
A practical rule is that anything made-to-order should be chosen first, because the rest of the plan often has to fit around it.
Demolition and site preparation
Demolition is usually fast, but it can trigger surprises, especially in older bathrooms. Once wall linings and floors come up, issues like water damage, uneven substrates, or unapproved past work can become visible.
To keep this stage from expanding:
- Expect minor rectification work as a normal possibility
- Ensure a clear plan for waste removal and site access
- Confirm who is responsible for isolating services (water and power) safely
Even when the demo itself is quick, remediation can add extra days.
Rough-in: plumbing and electrical before walls close
Rough-in is the behind-the-scenes stage where everything is positioned before waterproofing and tiling make changes expensive. Plumbing lines, drains, electrical cabling, lighting points, and exhaust fan ducting are typically set here.
Delays at this stage are often caused by:
- Layout changes after demolition reveals constraints
- Missing fixtures needed for accurate placement (like a specific vanity or mixer)
- Discovering that older wiring or plumbing needs upgrading to meet current expectations
A useful timeline habit is to treat rough-in as a checkpoint: once it is complete, you want fewer decisions left that affect where services sit.
Waterproofing and curing time
Waterproofing is a critical stage and it is not one you can rush. Proper preparation, correct application, and adequate curing time matter more than shaving off a day or two.
Timeline risks include:
- Wet or uneven substrates that need more prep work
- Humidity slowing cure times
- Rework if waterproofing details are incomplete around penetrations and junctions
If your schedule is tight, it is tempting to compress this stage, but doing so often leads to the most expensive type of delay later: fixing a failure after finishes are installed.
Tiling, grouting, and silicone work
Tiling looks like the “visible progress” stage, but it is also detail-heavy. Layout decisions, tile cuts, falls to drains, niche detailing, and edge finishes all take time.
Common causes of tile-stage blowouts:
- Changing tile selection after work begins
- Tiles arriving damaged or from different batches
- Complex patterns, large-format tiles, or feature walls increasing labour
- Additional drying time needed before grouting and sealing (where applicable)
If you want a predictable tile schedule, finalize the tile layout plan before the first tile is set.
Fit-off: cabinetry, fixtures, and finishing
Fit-off includes installing the vanity, toilet, tapware, mirrors, accessories, towel rails, lighting, and shower screen. This is where a bathroom becomes usable again, but it can stall if a single key item is missing.
Typical fit-off delays come from:
- Backordered tapware or mismatched finishes
- Shower screen measurements taken late, or custom screen lead times
- Accessories not matching the wall blocking or stud positions set earlier
Small items matter here. A missing mirror can be inconvenient, but a missing shower screen can prevent practical use of the space.
Practical ways to reduce delays
You cannot eliminate every unknown, but you can reduce the big ones.
A few approaches that consistently help:
- Lock the scope early: avoid layout changes once rough-in is done.
- Order long-lead items first: vanity and shower screen timing frequently dictates the final handover date.
- Build in a contingency buffer: even a few extra days in the plan can prevent rushed decisions.
- Confirm selections in one pass: make tile, tapware, and accessory choices together so finishes align.
- Keep access and communication simple: delays often happen when trades cannot coordinate site entry or approvals.
A bathroom renovation timeline works best when it is treated like a sequence of dependencies rather than a list of tasks.
A simple timeline template you can map to your project
Use this as a planning scaffold, then adjust for your scope:
- Pre-construction planning and ordering
- Demolition and remediation (if needed)
- Rough-in plumbing and electrical
- Waterproofing and curing
- Tiling, grouting, silicone
- Fit-off and finishing details
- Final checks and clean
If you can keep decisions ahead of the work, most timelines become far more stable. The goal is not speed for its own sake. It is a clean sequence where each step sets up the next, with fewer last-minute changes driving rework.