DIY vs Pro: Garbage Disposal Replacement Cost Breakdown
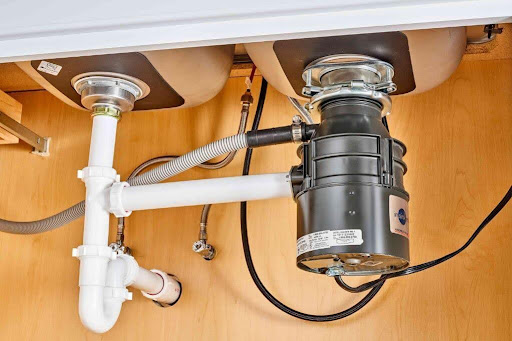
A garbage disposal makes kitchen cleanup faster—until it starts humming, leaking, or jamming every other day. When that happens, most homeowners ask the same question: Should I replace it myself or hire a professional?
The answer depends on your budget, your confidence with plumbing/electrical basics, and whether your setup is simple or “surprise” complicated. This guide breaks down the real garbage disposal replacement cost, including unit pricing, labor rates, hidden expenses, and the situations where DIY isn’t worth the risk.
If you’re considering professional help, southernplumbingworks.com can help you get an accurate quote and a clean installation that won’t leak two weeks later.
Why garbage disposals usually need replacement
Most disposals last 8–15 years, depending on how often you use them and what goes into them. Replacement becomes more likely when you notice:
- Frequent jams (grinding mechanism or motor wearing out)
- Persistent leaks from seals, flange, or housing cracks
- Loud rattling or metal-on-metal noises
- Humming without grinding (stuck flywheel or failing motor)
- Constant reset button use (overheating, weak motor, internal failure)
- Old age with poor performance, higher noise, and fewer safety features
Sometimes repairs make sense—but if you’re dealing with repeated issues, replacement is usually the cheaper long-term move.
Average garbage disposal replacement cost (unit + install)
Here’s the most realistic cost range homeowners see:
1) Cost of the disposal unit
Prices vary mostly by horsepower, materials, and noise insulation.
- Budget (1/3 HP): $50–$120
- Mid-range (1/2 to 3/4 HP): $120–$300
- Premium (1 HP+ / quieter / stainless components): $300–$600
2) Professional installation cost
Labor usually adds:
- Standard install: $150–$400
- Complex install (electrical/plumbing changes): $500+
Total typical cost (DIY vs Pro)
- DIY total: ~$70–$650 (unit + supplies/tools)
- Professional total: ~$250–$625 (unit + labor)
- High-end pro install: $800+ (premium unit + extra work)
DIY replacement: what you’ll actually spend
DIY can save money—if your setup is straightforward and you install it correctly.
DIY cost checklist
You pay for:
- Disposal unit ($50–$600)
- Plumber’s putty, Teflon tape, wire nuts, etc. ($10–$30)
- Tools you don’t already own ($20–$80)
Typical DIY total: $70–$650
Most homeowners land around $150–$250 using a mid-range disposal.
DIY time commitment
- First-timers: 2–4 hours
- Experienced DIY: 1–2 hours
Pro installation: what you’re paying for
Hiring a plumber isn’t just “paying someone to twist pipes.” A good pro installation usually includes:
- Correct mounting and sealing (no slow leaks ruining cabinets)
- Proper electrical connection and grounding
- Alignment of discharge piping (no strain or future cracks)
- Old unit removal and cleanup
- Faster install time (often 1–3 hours)
- Labor warranty and (often) better manufacturer warranty compliance
If you want a clean, stress-free job—especially if anything about your current setup looks odd—professional installation is usually the safer bet.
Hidden costs people don’t expect
Even “simple” replacements can trigger extra expenses:
- Electrical updates (new outlet, dedicated circuit, old wiring issues): $100–$300
- Drain pipe/P-trap replacement (corrosion or misalignment): $20–$60 + labor
- New sink flange/mount assembly (incompatible or worn): $15–$40
- Dishwasher hookup issue (knockout plug removal or hose replacement): $10–$30
- Old unit disposal fee (depending on your area): $10–$50
- Upgrade to an air switch (cleaner and safer activation): $40–$100
Common DIY mistakes (and how to avoid them)
DIY fails usually come down to a few repeat problems:
Not shutting off power at the breaker
Turning off the wall switch is not enough. Always shut off the breaker and verify power is off.
Leaks from poor flange sealing
Skipping putty, using too little, or uneven tightening causes slow leaks that destroy cabinets over time.
Over-tightening connections
Overtightened fittings can crack plastic pipes and strip threads—leading to leaks and rework.
Dishwasher knockout plug mistake
If your dishwasher drains into the disposal, you must remove the knockout plug first—otherwise the dishwasher won’t drain properly.
Wrong unit size or clearance
Some disposals don’t fit with your existing drain setup under the sink. Measure first.
When DIY isn’t worth the risk
Choose a pro if any of these are true:
- You need new wiring, a new outlet, or circuit work
- Your plumbing is old/corroded, or pipes don’t line up cleanly
- Your cabinet space is tight or awkward
- You’re short on time and need it done fast
- Your disposal warranty requires professional installation
- You’re not comfortable working under a sink with electrical connections
One leak or wiring mistake can cost far more than the money saved on labor.
Choosing the right disposal (so you don’t replace it again soon)
A better unit can reduce jams, noise, and future repairs.
Quick selection guide
- 1/3 HP: light use, small household
- 1/2 HP: small family, moderate daily use
- 3/4 HP: best balance for most homes
- 1 HP+: heavy use, large family, quieter premium models
Also consider:
- Stainless steel grind components (last longer)
- Noise insulation if the kitchen is open-plan
- Multi-stage grinding if you cook often
Maintenance tips that extend lifespan
- Run cold water before, during, and after use (15 seconds after)
- Feed waste gradually—don’t dump everything at once
- Avoid grease, coffee grounds, pasta/rice, fibrous peels, and bones
- Monthly clean: ice cubes + salt (helps scrub buildup)
- Deodorize: citrus peels or baking soda + vinegar (then flush)
Final verdict: DIY or pro?
If your replacement is like-for-like, wiring is already set, and you’re comfortable with basic tools, DIY can be a solid money-saver.
But if you want speed, warranty protection, code-safe work, and zero leak stress, hiring a professional is usually worth the extra cost—especially when you factor in the hidden risks.