The Art of Background Removal and Changing Photo Backgrounds

A picture can say a thousand words, but the way a photo is presented can change the entire narrative. For photographers and social media enthusiasts, being able to remove or change photo backgrounds can elevate visual content significantly. Whether enhancing a professional portfolio or crafting standout social posts, mastering this skill has become essential.
This blog will guide you through the process of background removal, explore effective tools for the job, and offer practical tips to ensure every image stands out.
Why Background Removal Matters
Background removal involves separating the subject of an image from its backdrop. Whether you’re a photographer aiming for clean results in portraits or a content creator looking to enhance a product shot, this technique has many applications. For social media users, dynamic or themed backgrounds can help posts feel cohesive and visually interesting, driving engagement.
Changing a photo background also allows greater creative freedom. Want to place a product on a neutral canvas? Or transport someone to an exotic landscape? With the right skills, these options are at your fingertips.
Tools for Background Removal
To change or remove a photo background effectively, you need the right tools. Modern editing solutions offer a mix of convenience and precision, catering to different skill levels and needs. Some tools make quick, AI-driven edits based on edge detection, while others allow for manual adjustments for detailed customizations.
Consider platforms that provide easy-to-use interfaces and options for both automatic and manual edits. For high-quality outputs, choose a program that supports high-resolution images and precise edge selection. Web-based services, applications, or desktop solutions may vary in performance, but many offer consistent results when applied correctly.
Step-by-Step Guide to Removing and Changing Photo Backgrounds
Step 1: Preparing Your Image
Begin by selecting a high-resolution image, as better quality photos produce cleaner edits. Ensure the subject contrasts well with the background, as tools often rely on color and edge detection to isolate the subject.
Step 2: Import and Select the Subject
Import your image into your preferred background remover platform. Use the subject selection tool or an automatic AI-based feature if available. For more precision, you may need to outline the subject manually using brushes or lasso tools.
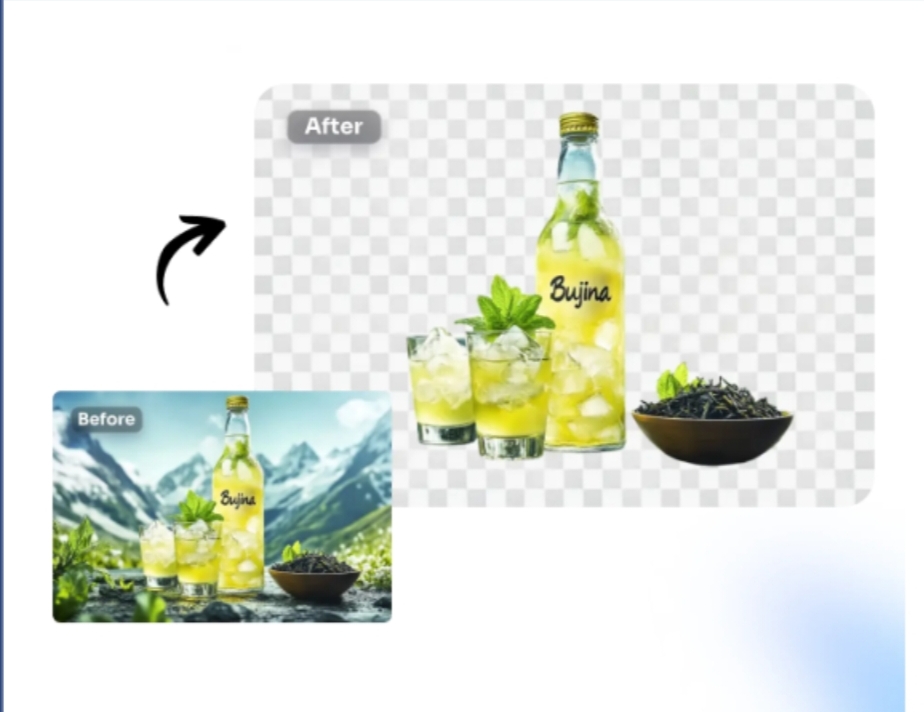
Step 3: Adjust and Refine Edges
Background removal isn’t complete without refining edges. Pay close attention to hair, fur, or finely detailed areas where tools might leave jagged lines or forget fine edges. Use edge refinement tools to smooth boundaries and create a neat separation.
Step 4: Add or Replace Background
Once the subject is isolated, replace the background with a solid color or a custom image. Ensure that the lighting and perspective of the new background align naturally with the subject.
Step 5: Apply Final Touches
Adjust the brightness, contrast, and sharpness. Blurring the edges slightly can help blend the subject with the new background seamlessly. Take some time for color correction to make everything look cohesive.
Step 6: Save the Image
Always save your image in a high-quality format, particularly if you’re using it for professional purposes. Formats like PNG preserve quality and transparency well.
Tips and Tricks for Professional-Looking Results
1. Choose the Right Image
A photo with a cluttered background or insufficient contrast can be harder to edit. Start with high-resolution images where the subject distinctly stands out from the background.
2. Pay Attention to Edges
Details matter, especially around the edges. Hair, foliage, or intricate parts of the subject often require extra attention. Look for tools that allow feathering or brush adjustments to refine these areas.
3. Use Lighting and Shadows Appropriately
When placing your subject on a new background, make sure the lighting matches. Shadows can ground your subject and make the final image look more realistic.
4. Keep it Consistent
If you’re working on a series, opt for consistent backgrounds to maintain a cohesive look and feel. This works particularly well for social media feeds or product catalogs.
5. Practice and Experiment
Background removal and replacement are skills that improve with time and exploration. Don’t shy away from trying different techniques or challenging compositions.
Elevate Your Visuals Today
Mastering the art of background removal and changing photo backgrounds can truly transform your images. Whether you’re elevating your photography portfolio or creating scroll-stopping social media posts, these techniques provide endless creative possibilities.
It’s all about starting with the right tools, practicing the basics, and refining your skills over time. The end result? Stunning visuals that leave lasting impressions.






